
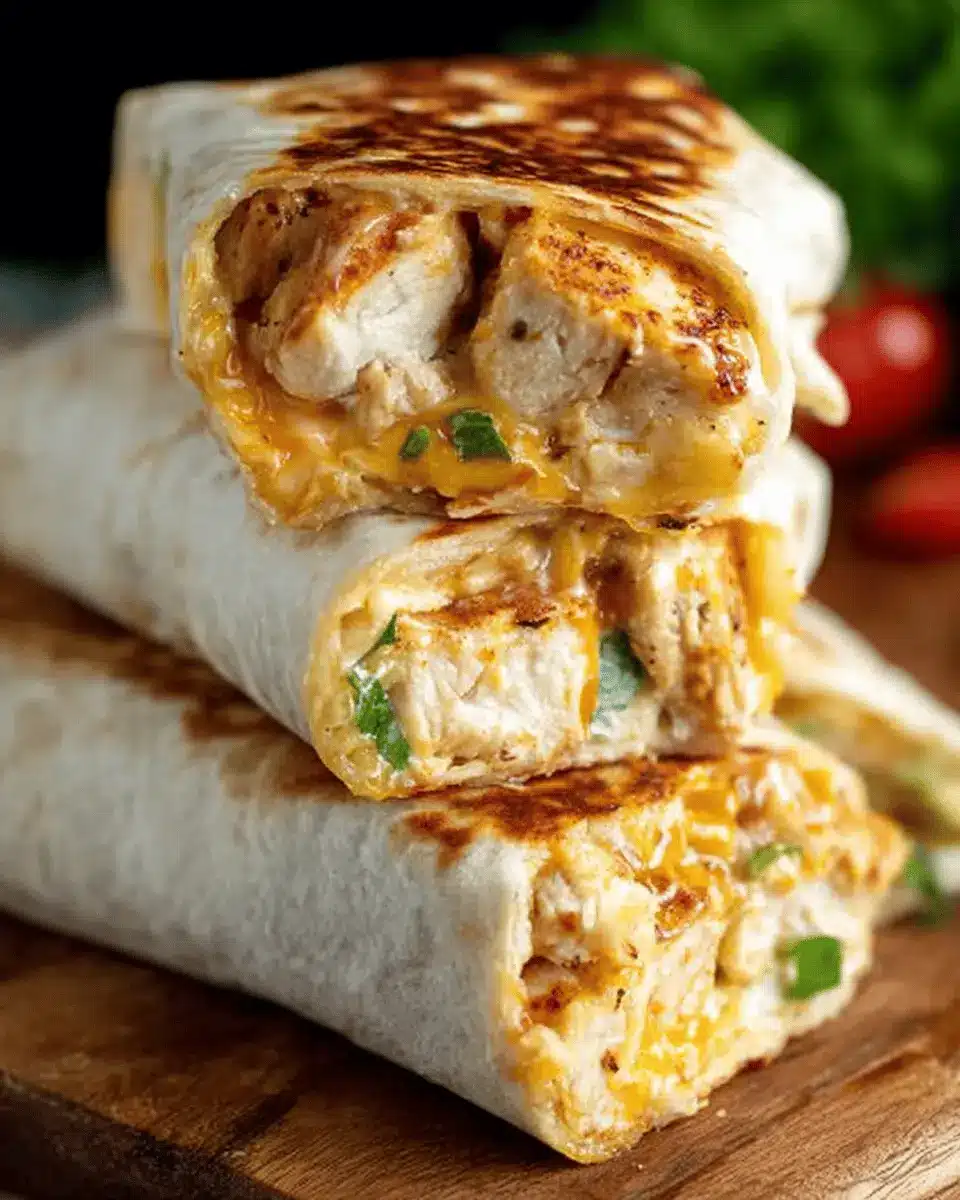
Introduction to Cheesy Garlic Chicken Wraps
Making your own cheesy garlic chicken wraps at home is not only a fun and satisfying kitchen project, but it also allows you to whip up a delicious and nutritious meal in no time. Why settle for takeout when you can create restaurant-quality wraps with fresh ingredients? Plus, customizing them to your taste means every bite is exactly how you like it.
Why Choose Homemade Cheesy Garlic Chicken Wraps?
Homemade tutorials are all the rage for a reason! By preparing your own wraps, you have total control over the ingredients and portion sizes. Whether you're mindful of calories or simply prefer a lighter version, you can adapt the flavors effortlessly. Studies show that cooking at home can lead to healthier eating habits; you can learn more about this trend in research from the Harvard T.H. Chan School of Public Health.
These cheesy garlic chicken wraps are perfect for busy professionals. They come together quickly and can even be prepped ahead for a quick meal during the week. Imagine this: you come home after a long day, and all that delicious filling is waiting for you in the fridge. Just wrap it up, give it a little heat, and voilà!
If you’re interested in optimizing your meals further, check out this great article on meal prepping from the Food Network. Your future self will thank you!
Ingredients for Cheesy Garlic Chicken Wraps
Making delicious cheesy garlic chicken wraps is all about choosing the right ingredients. Here's how to gather them for a truly satisfying meal.
Essential Ingredients for the Wraps
For the perfect wrap, you'll need a mix of wholesome and flavorful ingredients:
- Tortillas: 2 large tortillas (opt for regular or low-carb varieties).
- Cooked Chicken: 7 oz (about 200 grams), chopped. Rotisserie chicken works wonderfully for convenience.
- Garlic: 2 cloves, minced or grated—this is where that garlic kick comes from!
- Light Mayonnaise: 2 tablespoons for creaminess.
- Greek Yogurt: 1 tablespoon adds tang and healthy probiotics.
- Hot Sauce: 2 teaspoons for a bit of heat (Frank’s is a fan favorite).
- Salt: ¼ teaspoon to enhance flavors.
- Cheese: 3 oz (90 grams) grated cheese—used a cheddar blend for that melty goodness.
- Green Onion: 1, chopped for a fresh, crunchy finish.
- Olive Oil Spray: To ensure a beautifully crispy wrap.
Optional Ingredients for Customization
Feel free to get creative! Here are some optional ingredients to customize your cheesy garlic chicken wraps:
- Veggies: Add spinach, bell peppers, or even avocado slices for extra nutrition.
- Spices: A sprinkle of paprika or Italian seasoning can elevate the flavor profile.
- Different Cheeses: Try mozzarella for a stringy texture or feta for a tangy twist.
- Protein Alternatives: Use turkey bacon or even beef for some variety.
Feel inspired to mix and match based on your preferences! Not only do these wraps pack a punch of flavor, but they’re also incredibly versatile. For more recipe ideas, check out EatingWell or Bon Appétit. Happy cooking!
Preparing Cheesy Garlic Chicken Wraps
Gather and Prep Your Ingredients
Before diving into the delicious world of cheesy garlic chicken wraps, it’s essential to gather all your ingredients. This step makes cooking smoother and more enjoyable. You’ll need:
- 2 large tortillas (regular or low-carb/high-protein)
- 7 oz cooked chicken (about 200 grams, chopped—rotisserie chicken works great)
- 2 garlic cloves (minced or grated to taste)
- 2 tablespoons light mayonnaise
- 1 tablespoon light Greek yogurt (or plain yogurt)
- 2 teaspoons hot sauce (like Frank’s)
- ¼ teaspoon salt
- 3 oz grated cheese (about 90 grams; a cheddar blend is fantastic)
- 1 green onion (chopped)
- Olive oil spray
Make sure your ingredients are fresh. Pro tip: if you're tight on time, prepping the chicken filling a day ahead can save you hassle. Check out this resource on meal prepping for more tips.
Mix the Chicken Filling
Now that everything is ready, the fun part begins! In a medium bowl, combine the chopped chicken, minced garlic, mayonnaise, yogurt, hot sauce, and a sprinkle of salt. Mix well until all the ingredients are fully incorporated. Trust me—this mixture smells amazing!
This chicken filling is not just a quick recipe; it’s versatile. Doing meal prep? You can store this mix for up to three days in the fridge. It works great in various dishes, so feel free to get creative!
Assemble Your Wraps
With your filling ready, it’s time to assemble those cheesy garlic chicken wraps. Start by laying out your tortilla flat. On the lower third, sprinkle about 2 tablespoons of cheese. Next, add about ⅔ cup of your chicken mix, followed by another tablespoon of cheese and a sprinkle of chopped green onion. This layers the flavor beautifully!
To wrap it up, fold the sides of the tortilla inward and then roll it tightly from the bottom. As you roll, remember to keep the filling snug—this helps with crispiness later.
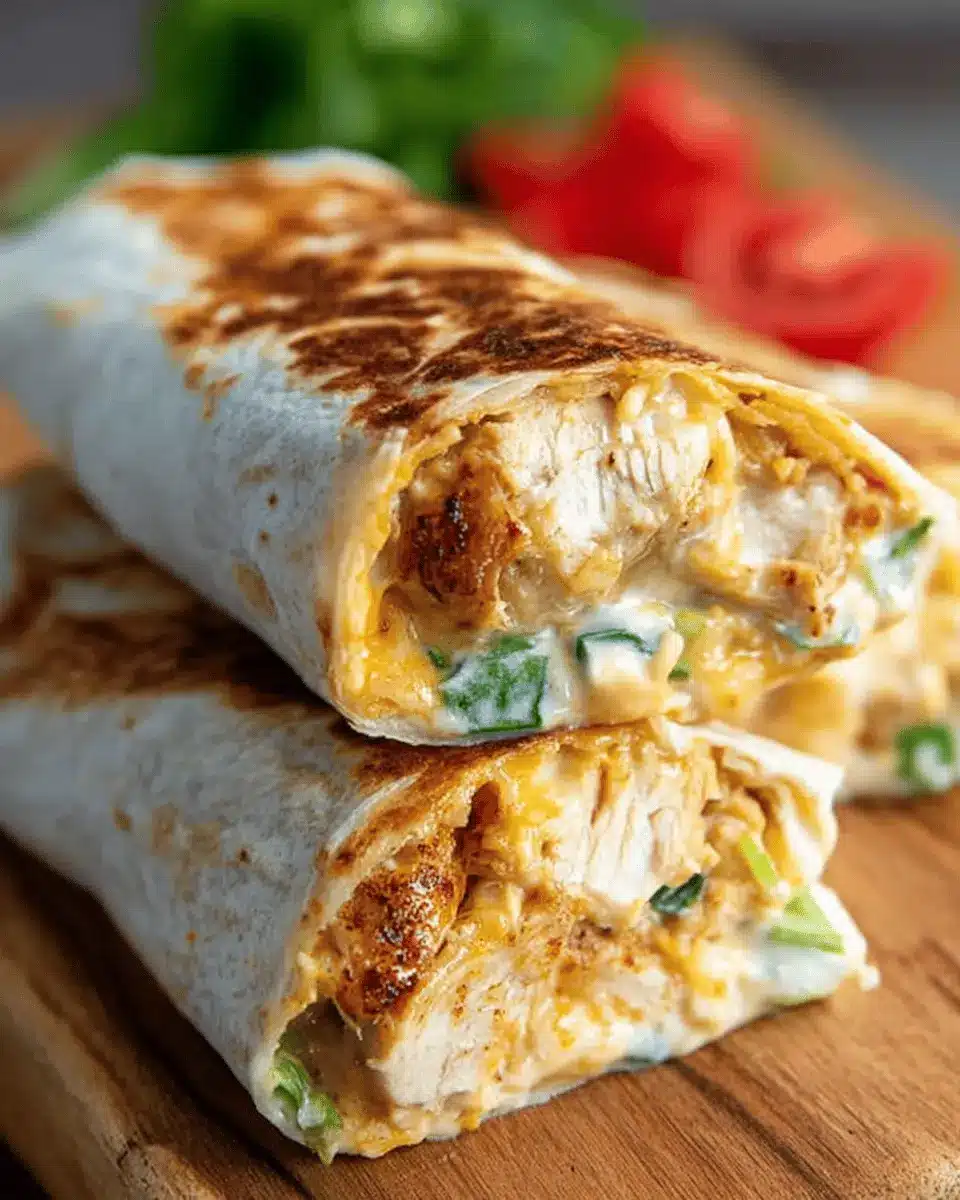
Cook to Perfect Crispiness
To achieve that irresistible crunch, heat a non-stick pan over medium-high heat and spray it lightly with olive oil. Place your cheesy garlic chicken wraps seam-side down, and let them cook for about 3–4 minutes. Keep an eye on them! Once golden brown, flip them over and cook the other side. Covering the pan helps melt the cheese and warms the filling faster.
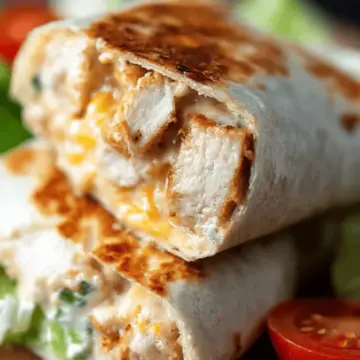
Enjoy Your Tasty Creation
Once nicely browned, slice the wraps in half for easy handling, and serve them up hot! These wraps are delightful on their own, but for an extra treat, pair them with a crunchy salad or some roasted veggies. You can even add a side of salsa or pickles for dipping.
And there you have it—an easy, delicious way to enjoy your cheesy garlic chicken wraps! They'll quickly become a favorite in your meal rotation. Bon appétit!

Variations on Cheesy Garlic Chicken Wraps
Spicy Cheesy Chicken Wraps
Looking to turn up the heat on your cheesy garlic chicken wraps? Add sliced jalapeños or a sprinkle of cayenne pepper for that extra kick. You could also swap in pepper jack cheese for a delightful twist. My friends love this spicy twist, and it’s perfect for those who enjoy a flavor adventure! Don't forget to serve these with a side of creamy ranch or blue cheese dressing for dipping.
Veggie-Loaded Cheesy Wraps
For a healthier spin, transform your cheesy garlic chicken wraps into veggie-loaded delights. Fill your wraps with colorful bell peppers, spinach, and roasted zucchini to enhance both flavor and nutrition. This variation not only boosts fiber but also adds a satisfying crunch. And if you want to make it even better, consider incorporating some hummus for a creamy alternative to mayonnaise. It's a fantastic way to enjoy a guilt-free lunch while still savoring that cheesy, garlicky goodness!
Feel free to experiment and discover your own combinations—after all, the best wraps are the ones personalized to your taste.
Cooking Notes for Cheesy Garlic Chicken Wraps
Tips for Perfectly Melted Cheese
For those cheesy garlic chicken wraps that ooze with deliciousness, use a good melting cheese like cheddar or mozzarella. Layer cheese both inside the wrap and on top before cooking. This ensures it melts, becoming a gooey filling and a crunchy topping. Cooking with the lid on also traps heat, making that cheese melt faster—just trust me on this one!
How to Make Ahead of Time
To save some time, prepare the chicken filling up to 2–3 days ahead and store it in the fridge. This way, all you need to do is wrap it up and cook when hunger strikes. If you want an easy lunch option, make extra filling to use in salads or as a topping for baked potatoes. Cooking just got a whole lot easier!
Serving Suggestions for Cheesy Garlic Chicken Wraps
Ideal Sides to Pair with Your Wraps
While your cheesy garlic chicken wraps are hearty on their own, adding sides can elevate your meal. Consider pairing them with:
- A fresh, crunchy salad tossed in a light vinaigrette to enhance those savory flavors.
- Roasted veggies, like sweet potatoes or bell peppers, for a warm, comforting touch.
- Crispy tortilla chips served with a zesty salsa or guacamole for a fun crunch.
Dipping Sauces for Extra Flavor
To really take your cheesy garlic chicken wraps to the next level, don't forget the dipping sauces! Here are a few tasty options to try:
- Creamy ranch dressing: A classic that pairs beautifully with the richness of the wraps.
- Spicy sriracha mayo: For those who crave a kick, this sauce adds excitement.
- Barbecue sauce: The sweetness contrasts nicely with the garlicky goodness.
Experiment and find your favorite combinations—dipping can make mealtime so much more fun!
Time Breakdown for Cheesy Garlic Chicken Wraps
Preparation Time
Get ready to roll in just 10 minutes! This is your chance to chop, mix, and create the flavorful filling.
Cooking Time
Cook your cheesy garlic chicken wraps in about 8 minutes. A quick flip during pan-frying ensures that lovely golden crispiness.
Total Time
In just 18 minutes, you can enjoy a delicious, satisfying meal that everyone will love. Perfect for busy weeknights or casual gatherings!
If you’re looking for a tasty way to spice up your mealtime, consider pairing these wraps with a crunchy salad or even some baked potato wedges. For more inspiration, check out Delish for side dish ideas that will complement these wraps beautifully. Happy cooking!
Nutritional Information for Cheesy Garlic Chicken Wraps
Calories
Indulging in these cheesy garlic chicken wraps will set you back about 476 calories per wrap. This makes for a hearty meal option that balances flavor and satisfaction without sacrificing your dietary goals.
Protein
You’ll get a solid 38 grams of protein in each wrap, thanks to the chicken and cheese. This high protein content not only supports muscle growth but also keeps you feeling full longer—perfect for busy young professionals on the go!
Sodium
Keep in mind that these wraps contain approximately 1,090 mg of sodium. While flavorful, it's wise to be cautious if you’re watching your salt intake. You can easily reduce this by using low-sodium ingredients or opting for fresh herbs for extra flavor without the added salt.
Having nutritional knowledge on hand can help you make informed choices, allowing you to enjoy your favorite meals while still staying on track with a healthy lifestyle. For more detailed tips on sodium and health, check out resources like the American Heart Association.
FAQs about Cheesy Garlic Chicken Wraps
Can I bake these wraps instead of pan-frying?
Absolutely! You can bake your cheesy garlic chicken wraps for a healthier alternative. Simply preheat your oven to 400°F (200°C) and bake them for 10–12 minutes, flipping them halfway. While baking gives them a nice texture, pan-frying offers an extra crunch that many people love. An air fryer is another great option—just set it to 375°F (190°C) for about 6–8 minutes!
How should I store leftovers?
Leftovers? No problem! Store your cooked wraps in the fridge for up to 2 days. To maintain that crispy texture, reheating them in a skillet or air fryer is best. The filling can be frozen for up to a month, so don’t hesitate to make a double batch for easy meals later!
What are some good substitutions for the ingredients?
Got a picky eater or dietary restrictions? Customize your cheesy garlic chicken wraps easily. Swap the chicken for turkey bacon or even chickpeas for a vegetarian option. Need a dairy-free alternative? Try cashew cheese or a plant-based yogurt. The recipe is versatile, so feel free to get creative!
For more tips on ingredient substitutions, check out this informative guide.
Conclusion on Cheesy Garlic Chicken Wraps
These cheesy garlic chicken wraps are an effortless, scrumptious option for busy nights or meal prep. Packed with flavor and healthy ingredients, they’re customizable and can be enjoyed by everyone. So, the next time you're looking for a quick meal, give this recipe a try—you won’t regret it!
Cheesy Garlic Chicken Wraps
Equipment
- non-stick pan
Ingredients
- 2 large tortillas regular or low-carb/high-protein
- 7 oz cooked chicken about 200 grams, chopped (rotisserie is great)
- 2 cloves garlic minced or grated (adjust to taste)
- 2 tablespoons light mayonnaise
- 1 tablespoon light Greek yogurt or plain yogurt
- 2 teaspoons hot sauce like Frank’s
- ¼ teaspoon salt
- 3 oz grated cheese about 90 grams (cheddar blend used)
- 1 green onion chopped
- Olive oil spray
Instructions
- In a bowl, mix chopped chicken, garlic, mayonnaise, yogurt, hot sauce, and salt.
- Lay out your wrap. On the lower third of the tortilla, sprinkle about 2 tablespoons of cheese, then top with about ⅔ cup of the chicken mixture. Add another tablespoon of cheese and a sprinkle of green onion.
- Fold in the sides of the tortilla, then roll it up tightly from the bottom.
- Heat a non-stick pan over medium-high. Spray with olive oil.
- Place wraps seam-side down. Cook for 3–4 minutes per side until crispy and golden. Cover with a lid to help heat the inside.
- Slice in half and serve!
Leave a Reply