
Introduction to Chocolate Thumbprint Cookies
If you're searching for a mouthwatering treat that balances rich chocolate flavor with a delightful texture, look no further than Chocolate Thumbprint Cookies. These delectable cookies are not just pleasing to the eye—each bite offers a sumptuous, chewy, and fudgy experience complemented by a luxurious chocolate ganache center.
What Makes Chocolate Thumbprint Cookies Irresistible?
So, what exactly makes these delightful cookies so irresistible? First, let’s talk about the dark chocolate base. The blend of cocoa powder and brown sugar softens the cookie's texture, making each morsel truly melt-in-your-mouth.
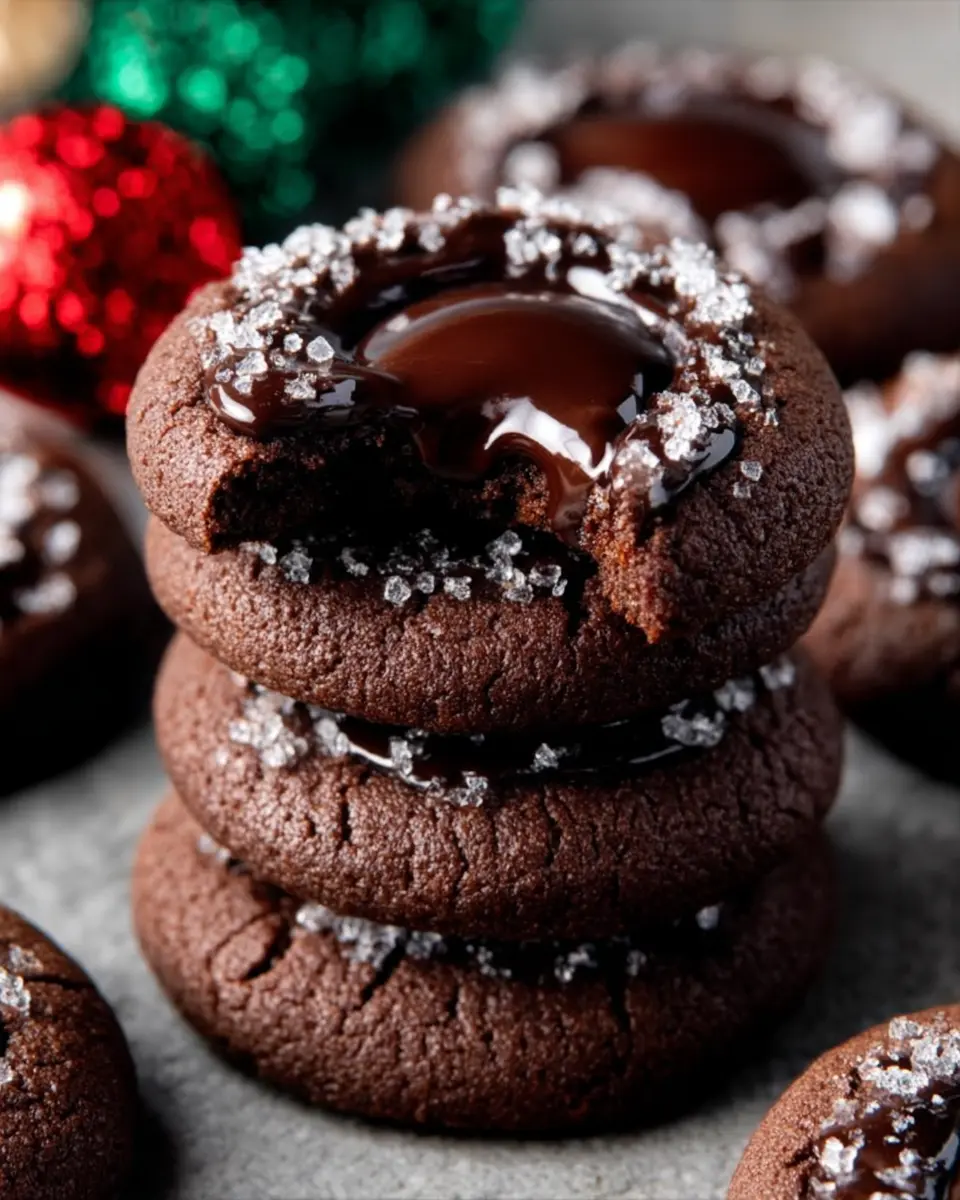
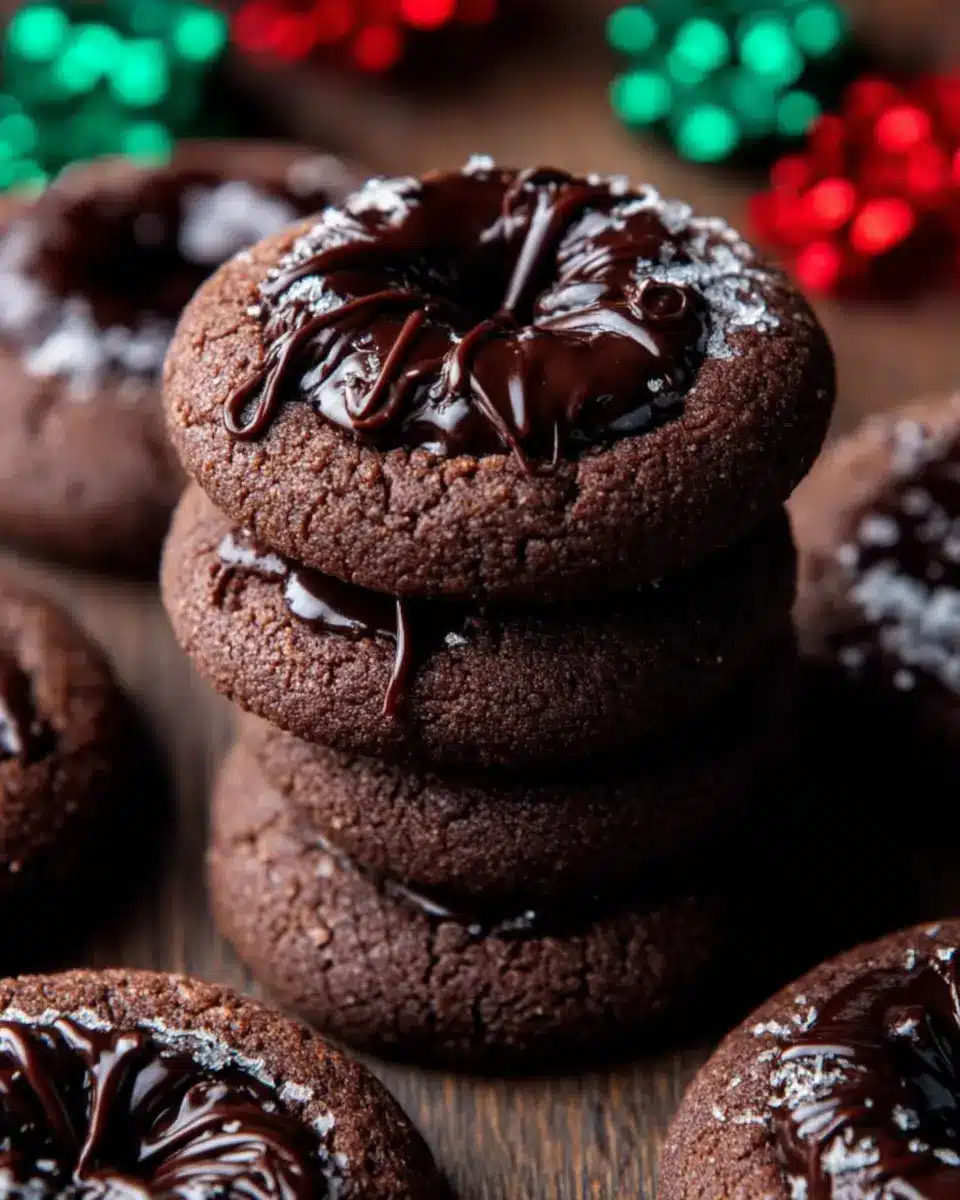
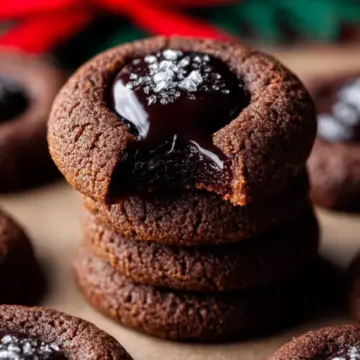
Next comes the visual appeal: the signature thumbprint creates a perfect little well, just begging to be filled with ganache. This doesn't just elevate the cookie's look; it adds a layer of silky richness that deepens the overall chocolate experience.
For more tips on creating delightful cookies, consider checking BBC Good Food for expert advice.
Moreover, the versatility of Chocolate Thumbprint Cookies allows for creativity—want to sprinkle some sea salt on top to balance the sweetness? Go for it! The options are endless, and that’s what makes baking at home not just practical, but a joy. Who wouldn’t want to enjoy a warm, homemade treat that’s as fun to make as it is to eat?

Ingredients for Chocolate Thumbprint Cookies
For the Cookies
Creating Chocolate Thumbprint Cookies begins with the right ingredients that blend beautifully together. Here’s what you need:
- 1 ½ cups (188 g) all-purpose flour - Ensure you spoon and level it for accuracy.
- ½ cup (40 g) cocoa powder - Dutch process gives the richest flavor.
- ½ teaspoon salt - Just a pinch to balance the sweetness.
- ½ teaspoon baking powder - This helps the cookies rise to perfection.
- ¾ cup (168 g) unsalted butter - Softened for easy creaming.
- ¾ cup (165 g) light brown sugar - Packed for that chewy texture.
- ¼ cup (50 g) granulated white sugar - For added sweetness.
- 2 egg yolks, at room temperature - They add richness and bind the dough.
- 1 ½ teaspoon vanilla bean paste or extract - Enhances the overall flavor.
For the Chocolate Ganache
To fill these delightful cookies, you’ll also need a luscious chocolate ganache:
- 1 cup (200 g) semi-sweet chocolate chips - Choose high-quality for the best results.
- ½ cup (120 ml) heavy whipping cream - This creates that velvety texture.
- Nonpareils for sprinkling on top (optional) - These add a festive touch.
These ingredients deliver rich flavor and satisfying texture while making the process enjoyable. Don't forget to check out King Arthur Baking for more baking tips!
Step-by-Step Preparation of Chocolate Thumbprint Cookies
Creating Chocolate Thumbprint Cookies is a fun and rewarding experience that fills your kitchen with delightful aromas. Let’s dive into each step to ensure your cookies come out perfectly every time!
Gather Your Ingredients
Before you start baking, it’s best to have everything on hand. For this recipe, you’ll need:
- 1 ½ cups all-purpose flour
- ½ cup cocoa powder (Dutch process)
- ½ teaspoon salt
- ½ teaspoon baking powder
- ¾ cup unsalted butter (softened)
- ¾ cup light brown sugar
- ¼ cup granulated sugar
- 2 egg yolks
- 1 ½ teaspoons vanilla extract
For the ganache:
- 1 cup semi-sweet chocolate chips
- ½ cup heavy cream
- Optional: nonpareils for decoration
Make sure you’ve measured everything accurately, as proper measurements are key to achieving that perfect texture!
Mix the Dry Ingredients
In a medium-sized bowl, whisk together the flour, cocoa powder, salt, and baking powder until combined. This step ensures that the cocoa and leavening agent are evenly distributed throughout the mix. It's a good idea to check out kingarthurbaking.com for more tips on flour measurement.
Cream the Butter and Sugars
In a large bowl, mix the softened butter, brown sugar, and granulated sugar using an electric mixer. Beat these ingredients for about two minutes or until the mixture becomes light and fluffy. This step is crucial as it incorporates air, giving your cookies that delightful chewiness.
Incorporate Egg Yolks and Vanilla
Next, add the two egg yolks and vanilla extract into your creamed mixture. Mix until everything is well combined. The mixture should look light and fluffy, which adds wonderful flavor to your Chocolate Thumbprint Cookies.
Combine Dry Ingredients with the Wet Mixture
Now, gradually incorporate the dry mixture into the wet ingredients. Mix just until combined; be careful not to over-mix. Your dough will be rich and chocolatey at this point.
Shape the Dough Balls and Indent
Scoop out portions of dough (about 1 tablespoon each) and roll them into balls. Place them on a baking sheet and, using a ¼ teaspoon, make an indent in the center of each cookie. This is where the ganache will later go, so aim for a nice-sized well!
Chill the Dough
Chilling the dough is essential for the best texture. Cover the dough balls with plastic wrap and refrigerate them for at least one hour. This will help your cookies maintain their shape while baking.
Bake the Cookies
Preheat your oven to 350°F while your dough chills. Once ready, arrange the dough on your baking sheets and bake for 9-11 minutes. For the perfect cookie, remember to check their doneness. Let them cool on the baking sheet for about five minutes before transferring them to a wire rack.
Prepare the Ganache
While the cookies cool, prepare the ganache. In a bowl, combine chocolate chips and heat the heavy cream until nearly boiling. Pour the hot cream over the chips and let sit for a minute before stirring until smooth. This indulgent chocolate center is what truly makes these cookies special.
Assemble the Cookies
To finish, fill each indent with about 1 teaspoon of ganache, adding sprinkles on top if desired. For a glossy finish, place them in the fridge for about 15 minutes to let the ganache set. Store any leftovers in an airtight container, but trust us, they won’t last long!
Enjoy your freshly baked Chocolate Thumbprint Cookies—they're sure to impress family and friends alike!
Variations on Chocolate Thumbprint Cookies
Nutty Chocolate Thumbprints
For those who adore a crunchy texture, try incorporating your favorite nuts! Simply fold in ½ cup of chopped walnuts, almonds, or hazelnuts into the dough before rolling into balls. These add an irresistible crunch and complement the rich chocolate thumbprint cookies beautifully.
Festive Holiday Versions
Make your chocolate thumbprint cookies holiday-ready by adding festive spices! Try mixing in 1 teaspoon of cinnamon or nutmeg, or even orange zest for a zesty twist. You can also replace the ganache with peppermint extract-infused chocolate for a delightful seasonal touch. These variations are perfect for celebrations or gift-giving! For more creative options, check out Serious Eats for ideas and inspiration.
Baking Tips and Notes for Chocolate Thumbprint Cookies
Importance of Proper Measurement
When baking Chocolate Thumbprint Cookies (or any cookie, for that matter), accurate measurements can mean the difference between chewy perfection and a dry disaster. Use the spoon-and-level method for flour—scoop it gently into a measuring cup and use a knife to level it off. If you have a kitchen scale, weighing your ingredients is even better for consistent results.
Chilling the Dough
Don’t skip the chilling step! Chilling your dough for at least an hour helps prevent the cookies from spreading too much during baking. This not only maintains their beautiful shape but also enhances the overall texture, contributing to that delightful chewiness we all crave. Plus, it gives you a little time to prep the ganache. Win-win!
Serving Suggestions for Chocolate Thumbprint Cookies
Perfect Pairings with Drinks
Elevate your Chocolate Thumbprint Cookies experience by serving them with delightful beverages. A steaming cup of coffee or a creamy hot chocolate complements the rich flavors of these cookies wonderfully. For something refreshing, consider pairing them with a rich vanilla chai or almond milk to balance the sweetness. Alternatively, a glass of cold milk never fails to enhance that nostalgic cookie vibe.
Festive Presentations for Gatherings
When it comes to impressing guests, presentation matters! Arrange your Chocolate Thumbprint Cookies on a beautiful platter, perhaps sprinkled with a touch of powdered sugar or decorated with sprinkles for an extra pop of color. You can place them in cute, individual treat bags tied with a ribbon for a charming take-home gift. These cookies are not just a sweet treat; they're a delightful addition to any festive gathering. Celebrate the joy of sharing homemade goodness!
For more fun and creative ideas, check out this guide on cookie presentations.
Time Breakdown for Chocolate Thumbprint Cookies
Preparation time
To get started with these delightful Chocolate Thumbprint Cookies, set aside about 15 minutes for prep work. This includes mixing the ingredients and preparing the dough.
Baking time
Once your dough is ready and chilled, the baking process will take approximately 10 minutes in the oven. Just enough time for the irresistible aroma to fill your kitchen!
Cooling time
After baking, allow the cookies to cool for about 5 minutes on the baking sheet before transferring them to a wire rack. Complete cooling might take a bit longer, especially if you plan to add the ganache. Patience pays off for these tasty treats!
For further tips on baking techniques, check out resources like King Arthur Baking and Joy of Baking to refine your skills.
Nutritional Facts for Chocolate Thumbprint Cookies
When indulging in these delightful Chocolate Thumbprint Cookies, it's good to know what you're enjoying. Here’s a quick glance at the nutritional breakdown:
Calories per cookie
Each cookie contains approximately 100 calories, making them a sweet treat you can savor without overindulging.
Sugar content
With about 7 grams of sugar per cookie, these cookies satisfy your sweet tooth while still being mindful of sugar intake.
Fat content
Each cookie packs around 5 grams of fat, which contributes to their deliciously rich texture. Enjoy them in moderation, and they'll be a fantastic addition to your dessert repertoire!
For more details about balancing your sweets with a nutritious diet, check out resources from the American Heart Association or The Academy of Nutrition and Dietetics.
FAQs about Chocolate Thumbprint Cookies
Can I use dark chocolate for the ganache?
Absolutely! Using dark chocolate for the ganache in your Chocolate Thumbprint Cookies will create a richer and more intense flavor. Just keep in mind that dark chocolate has a higher cocoa content, which can make your ganache slightly less sweet. Feel free to adjust the sugar levels in the cookie dough if you prefer a balanced sweetness.
How should I store leftover cookies?
To keep your Chocolate Thumbprint Cookies fresh, store any leftovers in an airtight container at room temperature. They’ll stay delicious for about three days. If you want to enjoy them for a little longer, consider refrigerating them, but be aware that this might slightly alter the texture.
Can I freeze the dough for later use?
Definitely! Freezing the dough is a great option if you want to enjoy freshly baked cookies later. Simply shape the dough into balls, place them on a baking sheet, and freeze until firm. Then transfer the frozen dough balls to a freezer-safe bag or container. They can be baked straight from the freezer; just add a couple of extra minutes to the baking time. For more tips on cookie baking, check out resources from King Arthur Baking.
Conclusion on Chocolate Thumbprint Cookies
In conclusion, Chocolate Thumbprint Cookies offer a delightful blend of rich flavors and textures that are sure to impress. Their chewy centers paired with smooth ganache make them an irresistible treat. Whether for a cozy gathering or a special occasion, these cookies are a must-try! Enjoy baking!
Chocolate Thumbprint Cookies
Equipment
- baking sheets
- medium-sized bowl
- large bowl
- Electric mixer
- Cookie Cutter
Ingredients
For the Chocolate Thumbprint Cookies
- 1.5 cups all-purpose flour spooned and leveled
- 0.5 cups cocoa powder Dutch process
- 0.5 teaspoon salt
- 0.5 teaspoon baking powder
- 0.75 cups unsalted butter softened
- 0.75 cups light brown sugar packed
- 0.25 cups granulated white sugar
- 2 large egg yolks at room temperature
- 1.5 teaspoon vanilla bean paste or extract
For the Chocolate Ganache
- 1 cup semi-sweet chocolate chips
- 0.5 cups heavy whipping cream
- nonpareils for sprinkling on top, optional
Instructions
For the Chocolate Thumbprint Cookies
- Line two baking sheets with parchment paper and set aside.
- Add flour, cocoa powder, salt and baking powder to a medium sized bowl. Whisk to combine, then set aside.
- Add butter, brown sugar and granulated white sugar to a large bowl. Cream together with an electric mixer for two minutes.
- Add the egg yolks and vanilla to the butter/sugar mixture and mix until pale in color and fluffy, 1-2 minutes.
- Add in the dry ingredients and mix just until combined.
- Scoop the dough into 34 portions, then roll into balls. (About 1 tablespoon of dough.)
- Transfer the dough to the baking sheets.
- Using a ¼ tsp, press down on the dough balls to create an indent.
- Chill the prepared indented dough balls for at least one hour.
- Preheat the oven to 350 degrees.
- Arrange the prepared dough about 1 ½ inches apart on the baking sheets.
- Bake the cookies for 9-11 minutes.
- When the cookies are done baking, lightly press down on the centers again with a ¼ tsp.
- Let the cookies cool on the baking sheet for 5 minutes. Transfer them to a cooling rack to completely cool.
For the Chocolate Ganache
- Add the chocolate chips to a small bowl.
- Heat the heavy cream in the microwave, or on the stove, until just about boiling.
- Pour the heavy cream over the chocolate chips and let sit for 1 minute.
- Stir to combine the cream and chocolate together.
Assembling the Cookies
- Fill each well of the cookies with about 1 teaspoon of ganache, more if it'll fit.
- Sprinkle sprinkles over the cookies if you wish.
- Chill the cookies in the fridge for 10-15 minutes to allow the ganache to set.
- Store leftovers in an air tight container for up to three days.


Leave a Reply