
Introduction to Homemade Marshmallows
Why make marshmallows at home?
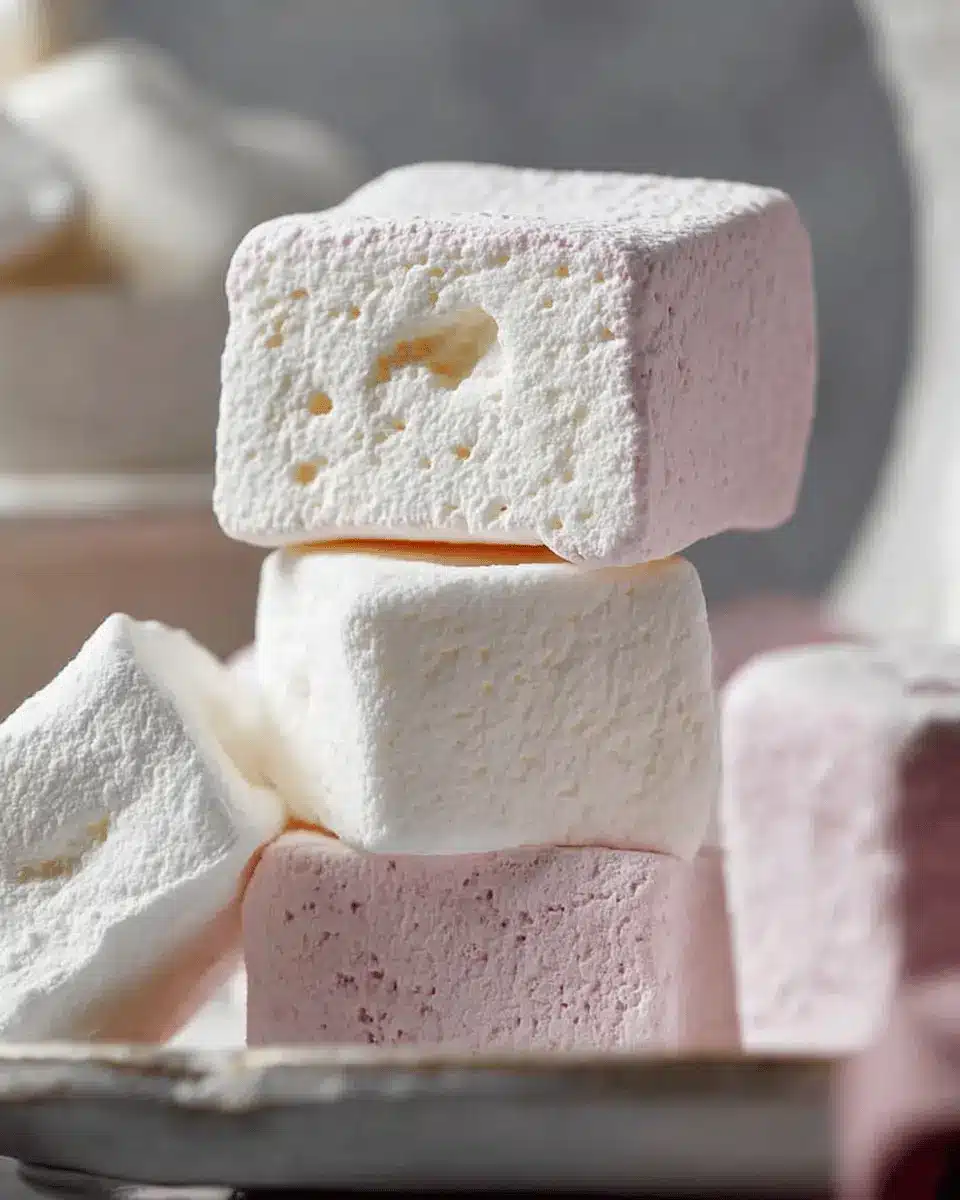
Have you ever wondered why you should take the plunge and make your own homemade marshmallows? Well, the answer starts with taste. Store-bought marshmallows often contain preservatives and artificial flavors, while homemade marshmallows are fresh, fluffy, and bursting with genuine vanilla flavor. When you create your own, you can customize them with various extracts or even colorful swirls!
Another reason to whip up a batch of homemade marshmallows is the sheer satisfaction you get from making something delicious from scratch. It’s a fun weekend project that can be shared with friends or family — imagine the joy of roasting your own marshmallows over a cozy fire! Plus, they make fantastic gifts. Who wouldn’t appreciate a box of soft, pillowy treats?
For those who enjoy baking or experimenting in the kitchen, this recipe is an exciting way to embrace your creativity. You can explore different textures and flavors, or even try dipping them in melted chocolate for an indulgent twist. Check out resources like Serious Eats and Bon Appétit for more ideas on crafting and enhancing your treats.
In short, homemade marshmallows are not just treats—they're a delightful experience! Ready to dive in? Let’s get started!
Ingredients for Homemade Marshmallows
Essential ingredients for fluffy marshmallows
To craft your own homemade marshmallows, you'll need some key ingredients:
- Water: This is crucial for dissolving the gelatin. You’ll use ⅔ cup, divided into two parts.
- Unflavored gelatin: Three envelopes (0.25 ounces each) are your magic ingredient for fluffiness.
- Granulated sugar: One cup sweetens and stabilizes your marshmallows.
- Light corn syrup: This adds desired moisture and gloss; one cup is perfect.
- Kosher salt: Just a pinch enhances all the flavors.
- Pure vanilla extract: Two teaspoons bring a warm aroma and richness.
- Powdered sugar: A cup for dusting, keeping your marshmallows from sticking together.
For a comprehensive guide on gelatin's role, consider checking out America's Test Kitchen.
Optional ingredients for flavoring
Want to elevate your homemade marshmallows game? Here are some easy ways to add a personal touch:
- Extracts: Beyond vanilla, try almond, peppermint, or coconut for different flavor profiles.
- Cocoa powder: A couple of tablespoons can turn your marshmallows into chocolatey goodness.
- Food coloring: Add a few drops to make pastel or vibrant marshmallows—perfect for parties!
- Mix-ins: Mini chocolate chips, crushed nuts, or dried fruit can be folded in for extra texture.
Experimenting with these optional ingredients allows you to customize your treat and make it uniquely yours!
Preparing Homemade Marshmallows
Making homemade marshmallows may seem like a daunting task, but with the right tools and a little guidance, you’ll be enjoying fluffy, delightful bites in no time. Let’s walk through the easy steps you’ll need to follow to create these sweet treats.
Gather your tools
Before diving into marshmallow making, it’s essential to have all your tools ready. Here’s a quick checklist:
- Stand mixer (with whisk attachment recommended)
- Medium saucepan
- Candy thermometer
- Pastry brush
- Rubber spatula
- 8”x8” pan (lightly greased and dusted with powdered sugar)
- Sift or sieve for powdered sugar coating
Make sure to gather everything beforehand, so you can focus on the fun part – creating your homemade marshmallows!
Prepare the gelatin
Start by measuring out ⅓ cup of water. Pour it into the bowl of your stand mixer, then sprinkle the unflavored gelatin evenly over the water. Give it a gentle stir and let it sit for about 10 minutes. This step is crucial because it allows the gelatin to bloom, ensuring that your marshmallows have that perfect chewy texture.
Cook the sugar mixture
In a medium saucepan, combine the remaining ⅓ cup of water with granulated sugar, corn syrup, and a pinch of kosher salt. Turn the heat to medium-high and keep an eye on the mixture as it simmers. Don’t stir it yet! Instead, attach your candy thermometer to the pan and wait for it to reach 240°F (the soft ball stage). If you notice any sugar crystals forming on the sides of the pan, clean them off using a damp pastry brush. This will keep your marshmallows smooth and silky.
Mix with the gelatin
Once the sugar mixture reaches the desired temperature, carefully pour it into the bloomed gelatin while your mixer is running on low speed. Add the pure vanilla extract and gradually increase the mixer’s speed to medium-high. Beat this concoction for about 8 minutes. At first, it might look runny, but gradually, the mixture will become thick and fluffy. You’ll know it’s ready when it pulls away from the sides in a delightful sticky mess.
Spread and let it set
Now comes the easy part! Use a lightly oiled spatula to spread the thick marshmallow mixture evenly into your prepared pan. It’s perfectly okay to get your hands a bit messy; just keep them wet to help manage the stickiness. Allow the marshmallows to sit at room temperature for at least 1 hour until they become firm.
As tempting as it may be to dig in right away, giving them time to set will make all the difference! Need some ideas on what to do with your homemade marshmallows? Check out this amazing guide on marshmallow recipes for inspiration.
With these steps, you’ll be well on your way to mastering the art of homemade marshmallows!
Variations on Homemade Marshmallows
Flavored Marshmallows
Why settle for plain when you can enhance your homemade marshmallows with delightful flavors? Add ingredients like chocolate, peppermint extract, or fresh fruit puree to create a variety of tastes. Experiment with seasonal flavors such as pumpkin spice or coconut for a unique twist. Just mix in a few teaspoons of your chosen flavor during the beating stage, and you'll quickly transform your marshmallows into flavor-packed treats!
Chocolate-Covered Marshmallows
Elevate your marshmallow game by dipping them in melted chocolate! Simply melt your favorite chocolate (dark, milk, or white), then coat each marshmallow generously. Once dipped, let them set on parchment paper to harden. This decadent combination of fluffy and rich creates a gourmet experience that’s perfect for gift-giving or cozy nights by the fire. For step-by-step savoring, check out this guide on chocolate techniques!
Cooking Tips and Notes for Homemade Marshmallows
Tips for Achieving the Perfect Texture
To create light and fluffy homemade marshmallows, pay attention to the gelatin. Let it bloom properly in water—a crucial step for texture. When mixing in the hot syrup, avoid rushing and gently fold it in to maintain that airy consistency. Beating the mixture for the full 8 minutes helps achieve the ideal thickness, so resist the urge to stop early!
Common Mistakes to Avoid
One common pitfall is not reaching the correct sugar syrup temperature. Use a reliable candy thermometer and avoid stirring once the syrup is on the heat to prevent crystallization. Also, be patient when cutting the marshmallows; a pizza cutter works best, and lightly coating your hands in powdered sugar can minimize stickiness. For more tips, check out this homemade marshmallow guide that dives deeper into perfecting your technique!
Serving suggestions for Homemade Marshmallows
Use in Hot Chocolate
One of the simplest yet most delightful uses for your homemade marshmallows is in hot chocolate. Picture this: a cozy evening, a warm mug of rich cocoa, and a handful of these fluffy treats melting into it, creating a creamy, delightful swirl. The marshmallows add just the right amount of sweetness and texture, elevating your drink to a whole new level. For an extra touch, you might consider making your hot chocolate with almond milk or a sprinkle of cinnamon.
S'mores and Other Desserts
Who can resist a classic s'more featuring homemade marshmallows? Simply roast your marshmallows over an open fire, then sandwich them between two graham crackers and a piece of chocolate. You can also incorporate these treats into other desserts like fruit salads, parfaits, or even a decadent cake. Thinking outside the box? Try pairing them with berries for a sweet-tart flavor combination. The options are nearly endless—get creative and enjoy!
Time Breakdown for Homemade Marshmallows
Preparation Time
Before diving into sweet marshmallow magic, allocate 25 minutes for preparation. This includes measuring ingredients, mixing your gelatin, and getting everything ready for cooking.
Cooking Time
The cooking phase takes about 10 minutes. It’s a quick but crucial step where you’ll combine ingredients to create that glossy marshmallow syrup.
Total Time
In total, you’ll spend 1 hour and 35 minutes on this delightful project. While the marshmallows need an additional hour to set, it’s worth the wait for perfect, fluffy homemade marshmallows!
For more delicious treats, consider checking out resources like Serious Eats for additional inspiration. Happy marshmallow making!
Nutritional Facts for Homemade Marshmallows
Calories
Each homemade marshmallow contains approximately 63 calories, making them a fun yet sweet treat. Enjoy them in moderation, and you'll find that they can fit into various dietary plans without too much guilt.
Sugar Content
With around 16 grams of sugar per marshmallow, it's no surprise these fluffy delights are on the sweeter side. While they are a delicious indulgence, keep in mind that sugar can add up quickly!
Other Nutritional Information
Besides calories and sugar, one marshmallow has about 16 grams of carbohydrates and only a minor sodium content of 10 mg. For those looking for a simple sweet treat, homemade marshmallows can be a delightful option—just remember to savor them!
For more nutritional insights, check resources like Healthline or USDA FoodData Central for comprehensive dietary breakdowns.
FAQs about Homemade Marshmallows
Can I store homemade marshmallows?
Absolutely! You can store your homemade marshmallows in an airtight container. It’s best to keep them in a single layer, but if you need to stack them, separate the layers with wax paper to prevent sticking.
How long do they last?
When stored properly at a cool temperature, your marshmallows can last for about two weeks. They tend to lose their fluffy texture over time, so for the best experience, try to enjoy them within the first week!
Can I use agar-agar instead of gelatin?
Yes, you can! If you're looking for a vegetarian alternative, agar-agar is an excellent choice. However, keep in mind that it doesn’t whip up quite like gelatin, so your homemade marshmallows may have a slightly different texture. It’s always fun to experiment and see what you like best! For detailed guidance on using agar-agar, check out this Resource for Gelatin Substitutes.
Now that you have the answers to these common questions, you’re all set to make the ultimate marshmallow treat!
Conclusion on Homemade Marshmallows
Making homemade marshmallows is not only fun but also rewarding! You’ll enjoy a treat that's far superior to anything store-bought. Whether you indulge them as a snack or deploy them in s'mores, these fluffy delights will impress. Give them a try and elevate your dessert game!
Marshmallows
Equipment
- Stand Mixer
- Saucepan
- Candy thermometer
- 8x8 inch pan
- spatula
- knife
Ingredients
Marshmallow Ingredients
- ⅔ cup water, divided
- 3 envelopes unflavored gelatin (find this next to the Jell-O at the grocery store)
- 1 cup granulated sugar
- 1 cup light corn syrup
- 1 pinch kosher salt
- 2 teaspoons pure vanilla extract
- 1 cup powdered sugar for dusting the pan and finished marshmallows
Instructions
Preparation
- Lightly spray the inside of an 8”x8” pan with vegetable cooking spray. Generously coat with powdered sugar and set aside.
- Pour ⅓ cup of the water into the bowl of a stand mixer. Sprinkle the gelatin over the water and stir briefly to incorporate. Let stand for about 10 minutes, or until the gelatin has softened.
- In a saucepan, off the heat, combine the remaining ⅓ cup of water and the granulated sugar, corn syrup, and salt. Place the pan over medium-high heat. Clip a candy thermometer on the inside of the pan, making sure it doesn’t touch the bottom. Cook the mixture without stirring until it reaches 240°F. Brush down the sides of the pan with a pastry brush, dipped in water, to gently wipe away any sugar crystals.
- With your mixer on low speed, very carefully add the hot syrup to the softened gelatin. Add the vanilla and increase the speed to medium-high. The mixture will start out clear, but quickly turns very white. Beat for about 8 minutes, or until the marshmallow gets very thick and sticky, and starts to pull away from the sides of the bowl, in string-like pieces.
- Spread the mixture into the prepared pan using a lightly oiled spatula. With wet hands, press the batter evenly into the corners of the pan. Just keep rewetting your hands to help with the stickiness. Set aside for at least 1 hour, or until the mixture is firm and cool.
- Sift some powdered sugar into a shallow bowl. Run a wet knife around the edge of the cooled pan to loosen the marshmallow. Remove the marshmallow from the pan, onto a cutting board or parchment paper. Cut into squares, using a pizza cutter. Toss each marshmallow in the powdered sugar until completely coated.
- Store marshmallows in a single layer, or in layers separated by wax paper. They will keep very well for quite a long time (a couple weeks!) when stored airtight at cool temperature.

Leave a Reply