
Introduction to Cheesy Garlic Chicken Wraps
If you're looking for a meal that hits the spot without the hassle, cheesy garlic chicken wraps are the answer. These wraps are not only packed with flavor but also offer a satisfying balance of protein and comfort. Perfect for lunch or a cozy dinner, they are quick to whip up and even easier to enjoy. And who can resist the combination of gooey cheese and aromatic garlic?
Why choose cheesy garlic chicken wraps? For starters, they are incredibly versatile! You can easily customize ingredients based on your dietary preferences or what you have on hand. Feel like adding some veggies for extra crunch? Go for it! Want to spice them up with your favorite hot sauce? Absolutely!
Plus, the chances of leftovers are slim when you serve these wraps—they're that good! Just imagine sinking your teeth into a crispy, golden wrap, bursting with garlicky goodness and melty cheese. If you're craving a fun, interactive meal, try rolling up your sleeves and inviting friends over for a wrap party!
For those who love meal prep, these wraps are your new best friend. Make the filling in advance to save time, and you're set for busy weekday lunches. Ready to dive into the recipe? Let’s get cooking!
Ingredients for Cheesy Garlic Chicken Wraps
Making cheesy garlic chicken wraps is easier than you'd think! The best part? You probably have most of these ingredients already in your kitchen. Let’s walk through what you need to whip up these delicious wraps.
Essential Ingredients
- Tortillas: Grab 2 large tortillas—feel free to choose between regular or low-carb/high-protein options based on your preference.
- Cooked Chicken: About 7 oz (or 200 grams) will do nicely. Rotisserie chicken works great here, making your prep super quick.
- Garlic: Use 2 cloves, either minced or grated for that garlicky goodness. Adjust to taste if you’re feeling adventurous!
- Condiments: You’ll need 2 tablespoons of light mayonnaise and 1 tablespoon of light Greek yogurt to create a creamy base.
- Hot Sauce: A tablespoon of hot sauce (I recommend Frank’s) adds a zesty kick.
- Cheese: Aim for 3 oz (90 grams) of your favorite grated cheese. A cheddar blend is perfect for that gooey center.
- Green Onions: Chopped green onions provide a fresh pop of flavor.
- Salt and Olive Oil Spray: Just a pinch of salt to bring everything together, and some olive oil spray for that crispy finish.
These ingredients unite for a high-protein meal that’s both satisfying and full of flavor. Want more tips? Explore Cooking Light for creative cooking hacks!
Preparing Cheesy Garlic Chicken Wraps
Making cheesy garlic chicken wraps is not only delicious but also easy to whip up, making it perfect for a quick lunch or a cozy dinner at home. Follow these straightforward steps to create that crispy, gooey goodness that will have everyone asking for seconds!
Gather Your Ingredients
Before you dive into cooking, it’s essential to gather all your ingredients to make the process seamless. For two servings of these tasty wraps, you will need:
- 2 large tortillas (opt for regular or low-carb/high-protein, depending on your preference)
- 7 oz cooked chicken (about 200 grams), chopped (rotisserie chicken works wonders for convenience)
- 2 garlic cloves, minced or grated (adjust based on your love for garlic)
- 2 tablespoons light mayonnaise
- 1 tablespoon light Greek yogurt (or plain yogurt)
- 2 teaspoons hot sauce (like Frank’s, if you want that extra kick)
- ¼ teaspoon salt
- 3 oz grated cheese (about 90 grams; a cheddar blend gives great flavor)
- 1 green onion, chopped
- Olive oil spray for cooking
With everything prepped, you’re ready to create your heavenly wraps!
Mix the Filling
Start by mixing your filling together. In a large bowl, combine the chopped chicken, minced garlic, mayonnaise, Greek yogurt, hot sauce, and salt. Stir until it's all well incorporated. This flavorful mixture is what will make your cheesy garlic chicken wraps so irresistible! You can even make this chicken filling ahead of time and keep it in the fridge for up to three days, which makes dinner prep even easier.
Assemble the Wraps
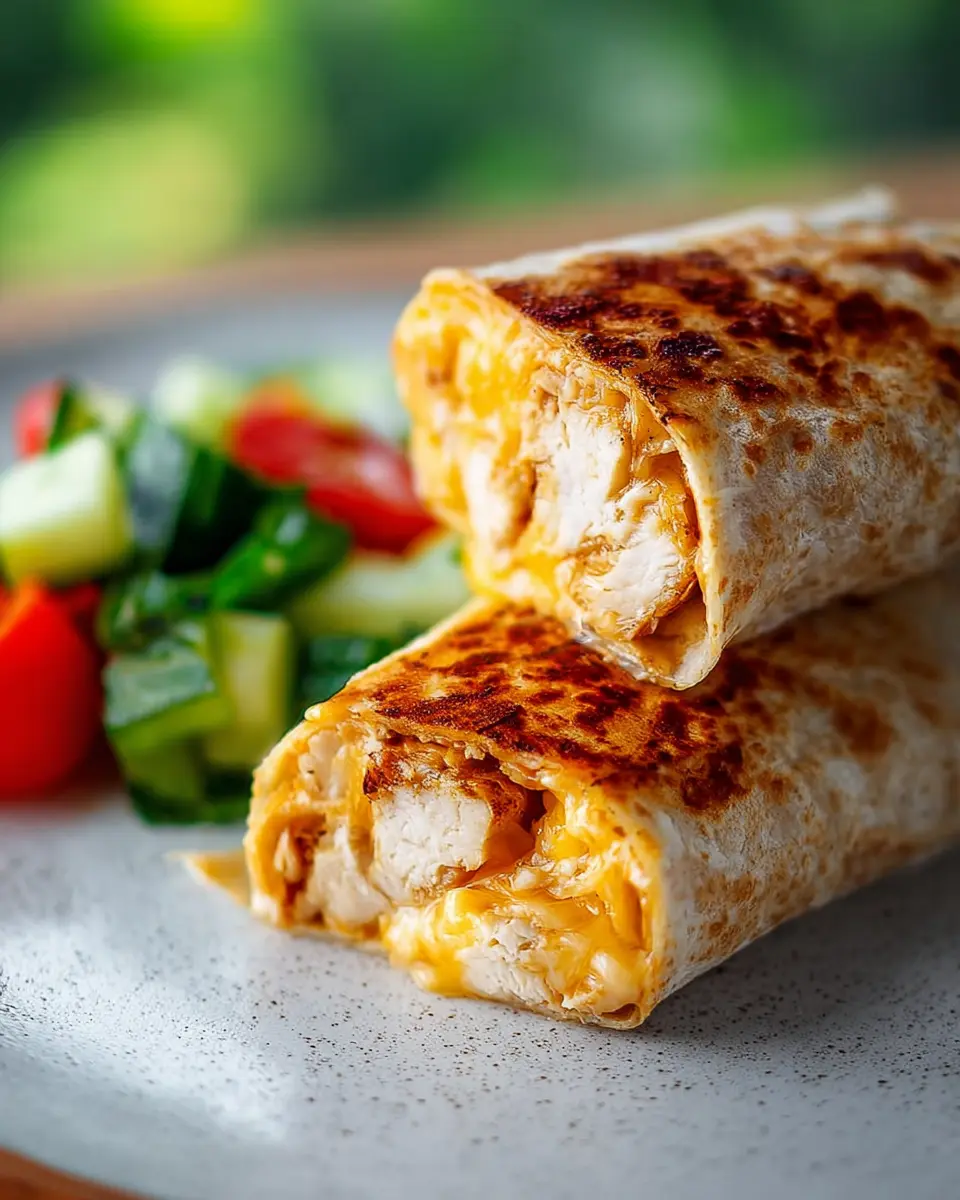
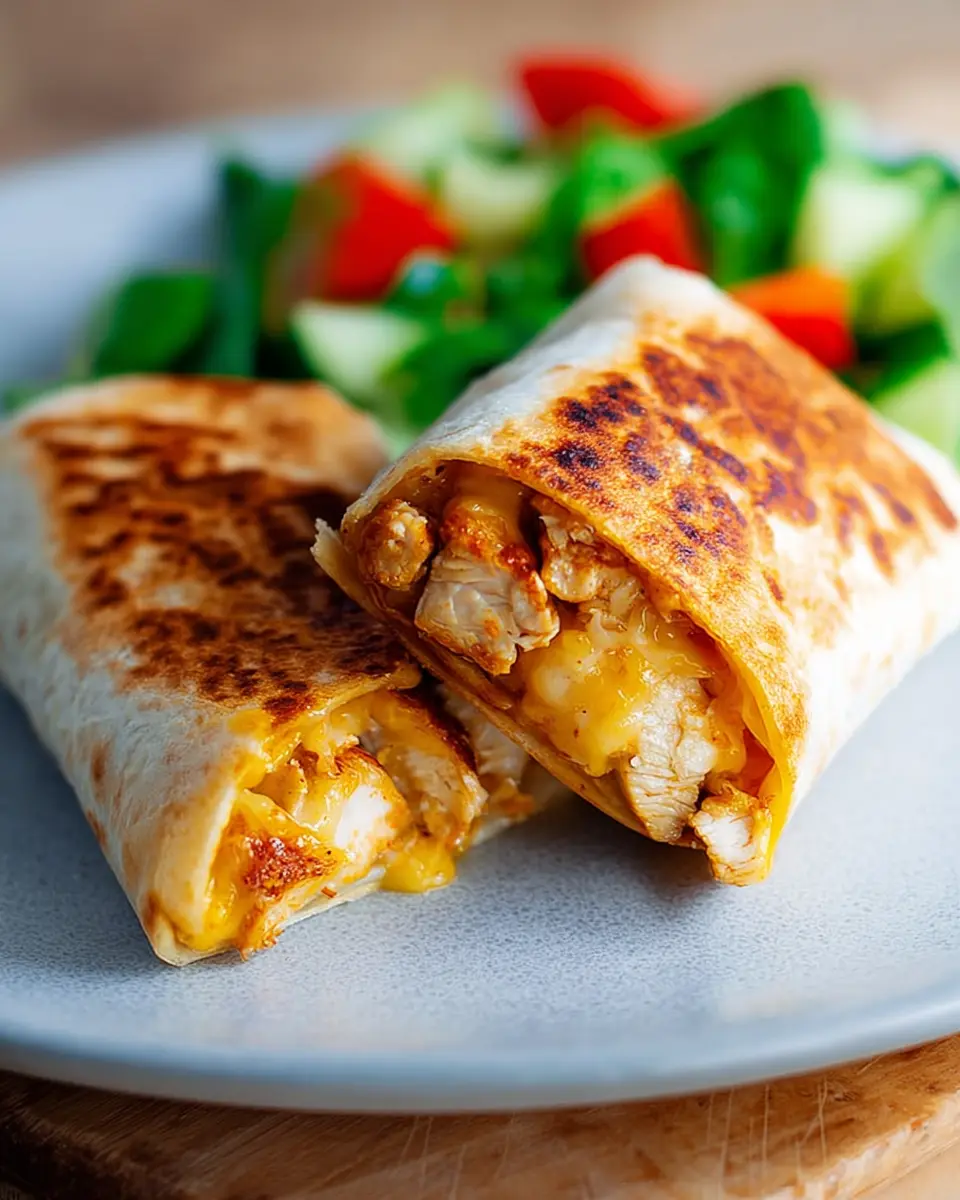
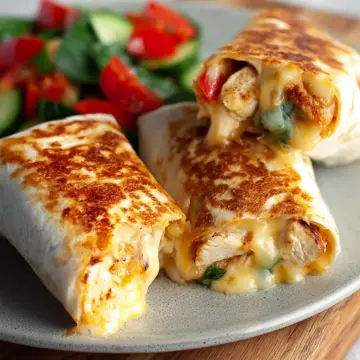
Next comes the assembly — this is where the magic happens! Lay out one tortilla flat on your working surface. On the lower third of the tortilla, sprinkle about two tablespoons of cheese. Then, add approximately two-thirds of a cup of the chicken filling over the cheese. To finish off, add another tablespoon of cheese and a sprinkle of chopped green onion for a fresh touch.
Now, fold in the sides of the tortilla and roll it up tightly from the bottom. Make sure it’s snug but not overly tight, so that the filling stays intact while cooking.
Cook to Crispy Perfection
Heat a non-stick pan over medium-high heat and spray it lightly with olive oil. Place your wraps seam-side down in the pan and cook for about 3-4 minutes per side until they are golden brown and crispy. Covering the pan with a lid will help melt the cheese and warm the filling faster—trust me, it’s worth it!
Serve Your Cheesy Garlic Chicken Wraps
Once they are perfectly cooked, slice each wrap in half and serve immediately. These cheesy garlic chicken wraps are fantastic on their own, but you can elevate the meal with a crunchy salad, roasted veggies, or even a side of salsa for dipping. They make for a satisfying and wholesome meal that’s sure to impress!
For more recipe ideas that complement these wraps, check out my other posts on healthy meal prep tips here and creative salad ideas here. Enjoy your wrap-making adventure!
Variations on Cheesy Garlic Chicken Wraps
Spicy Cheesy Garlic Chicken Wraps
If you crave a little heat, try making your cheesy garlic chicken wraps with a spicy twist. Simply add sliced jalapeños or a few extra dashes of your favorite hot sauce to the chicken mixture. The combination of gooey cheese and zesty spice is a match made in comfort food heaven. You can also use pepper jack cheese for an extra kick. Feeling adventurous? Try adding a bit of chipotle powder for a smoky flavor.
Veggie-Packed Cheesy Garlic Wraps
For a healthier spin, opt for veggie-packed cheesy garlic wraps. Incorporate sautéed bell peppers, spinach, or zucchini into your chicken filling for added nutrition and a burst of flavor. Not only do these colorful veggies brighten up your wrap, but they also complement the cheesy, garlicky goodness. If you want to keep it plant-based, swap the chicken for chickpeas or a hearty bean mix.
These variations are simple yet elevate the classic cheesy garlic chicken wraps to new heights!
Cooking tips and notes for Cheesy Garlic Chicken Wraps
Creating the perfect cheesy garlic chicken wraps is about balancing flavor and texture. Here are some handy tips:
-
Cheese Choices: While I suggest a cheddar blend, feel free to mix your favorite cheeses for varied taste. Mozzarella is great for extra gooeyness!
-
Filling Prep: Make the chicken filling ahead and store it in the fridge for up to 3 days—it's a time-saver for busy weeknights.
-
Crispy Factor: For that delightful crunch, ensure your pan is hot before adding the wraps. And don’t skip covering the pan; it helps the cheese melt perfectly!
-
Storage & Reheating: Cooked wraps can be refrigerated for up to 2 days. Reheat in a skillet or air fryer for that fresh-out-of-the-pan vibe.
For more wrap inspiration, check out this guide to creative fillings. Happy cooking!

Serving Suggestions for Cheesy Garlic Chicken Wraps
These cheesy garlic chicken wraps are delightful on their own, but you can elevate your meal experience with some tasty sides. Consider pairing them with a refreshing and crunchy salad loaded with your favorite veggies, such as mixed greens, cherry tomatoes, and cucumbers. You could even throw in some nuts or seeds for an extra crunch.
If you prefer something warm, roasted vegetables drizzled with olive oil and herbs make a fantastic companion. For a dip, try serving with a side of salsa or creamy yogurt sauce. And let’s be honest—adding a handful of crispy tortilla chips never hurts! These extras will enhance the comforting flavors of the wraps, making for a satisfying meal.
Time Details for Cheesy Garlic Chicken Wraps
Preparation Time
Getting ready to whip up those cheesy garlic chicken wraps? It takes about 15 minutes to gather your ingredients and mix the filling. Perfect for a quick meal before catching up on your favorite show!
Cooking Time
Once prepped, you’ll be cooking them for roughly 7 minutes. Just enough time to chat with a friend or dump your latest podcast episode!
Total Time
In just 22 minutes, you can go from kitchen newbie to dinner master with these delicious wraps. It’s a tasty solution to those busy weekdays!
Want more timing tricks for your meals? Check out this article on meal prep from the Academy of Nutrition and Dietetics for tips that can streamline your cooking time even further.
Don't forget: efficiency is key when you're hungry!
Nutritional Information for Cheesy Garlic Chicken Wraps
Calories
Each serving of these cheesy garlic chicken wraps packs approximately 476 calories, making it a hearty choice for lunch or dinner. Sprinkled with flavor and satisfaction, these wraps can fit well into a balanced diet.
Protein
With a generous 38 grams of protein per serving, these wraps are an excellent source of this essential nutrient. Perfect for those on a high-protein diet, the combination of chicken and cheese not only fills you up but also helps in muscle repair and growth.
Sodium
While delicious, it's important to note that each wrap contains about 1090 milligrams of sodium. This level may be a bit higher than recommended, so monitor your overall sodium intake, especially if you're sensitive to salt. Balance these wraps with fresh vegetables or a light salad to keep your meal nutritious and flavorful.
For more insights on healthy eating, check out Nutrition.gov or ChooseMyPlate.gov.
FAQs about Cheesy Garlic Chicken Wraps
Can I use leftover chicken for these wraps?
Absolutely! Leftover chicken is a fantastic way to save time and add flavor to your cheesy garlic chicken wraps. Rotisserie chicken works particularly well, giving you that deliciously tender texture with minimal effort. Just chop it up, mix with the other ingredients, and you’re ready to roll!
What's the best way to store cheesy garlic chicken wraps?
To keep your wraps fresh, store them in an airtight container in the fridge for up to 2 days. For reheating, a skillet or air fryer will help regain that crispy exterior. If you want to prep ahead, you can store the filling separately; it stays good for about 3 days in the fridge.
How can I make these wraps healthier?
It's easy to lighten up your cheesy garlic chicken wraps! Consider reducing the cheese or using low-fat options for mayo and yogurt. You can also swap in whole grain or low-carb tortillas to boost fiber content and make them even more nutritious. Adding a side of fresh veggies or a salad can elevate the health factor significantly!
For more creative healthy alternatives, you might want to check out Healthline for tips on nutritious meal planning.
Conclusion on Cheesy Garlic Chicken Wraps
In closing, cheesy garlic chicken wraps are your new go-to comfort food! Perfectly crispy on the outside and delightfully cheesy inside, they deliver flavor while being simple to prepare. Enjoy these wraps as a delightful lunch or dinner option and feel free to customize them to fit your taste. Happy cooking!
Cheesy Garlic Chicken Wraps
Equipment
- non-stick pan
Ingredients
- 2 large tortillas regular or low-carb/high-protein
- 7 oz cooked chicken about 200 grams, chopped (rotisserie is great)
- 2 cloves garlic minced or grated (adjust to taste)
- 2 tablespoons light mayonnaise
- 1 tablespoon light Greek yogurt or plain yogurt
- 2 teaspoons hot sauce like Frank’s
- 0.25 teaspoon salt
- 3 oz grated cheese about 90 grams (I used a cheddar blend)
- 1 green onion chopped
- Olive oil spray
Instructions
- In a bowl, mix chopped chicken, garlic, mayonnaise, yogurt, hot sauce, and salt.
- Lay out your wrap. On the lower third of the tortilla, sprinkle about 2 tablespoons of cheese, then top with about ⅔ cup of the chicken mixture. Add another tablespoon of cheese and a sprinkle of green onion.
- Fold in the sides of the tortilla, then roll it up tightly from the bottom.
- Heat a non-stick pan over medium-high. Spray with olive oil.
- Place wraps seam-side down. Cook for 3–4 minutes per side until crispy and golden. Cover with a lid to help heat the inside.
- Slice in half and serve!
Leave a Reply